
Table of Contents
Getting real-world data into Revit
Revit is the dominant BIM platform for building design in Ireland. It’s built for creating intelligent parametric models for new construction, but it also needs to interact with existing conditions – site terrain, neighbouring buildings, structures being renovated, and what’s actually been built on site.
Drone survey data fills this gap. Here’s how point clouds, surfaces, and imagery from drone surveys get into Revit and what you can do with them.
Import pathways
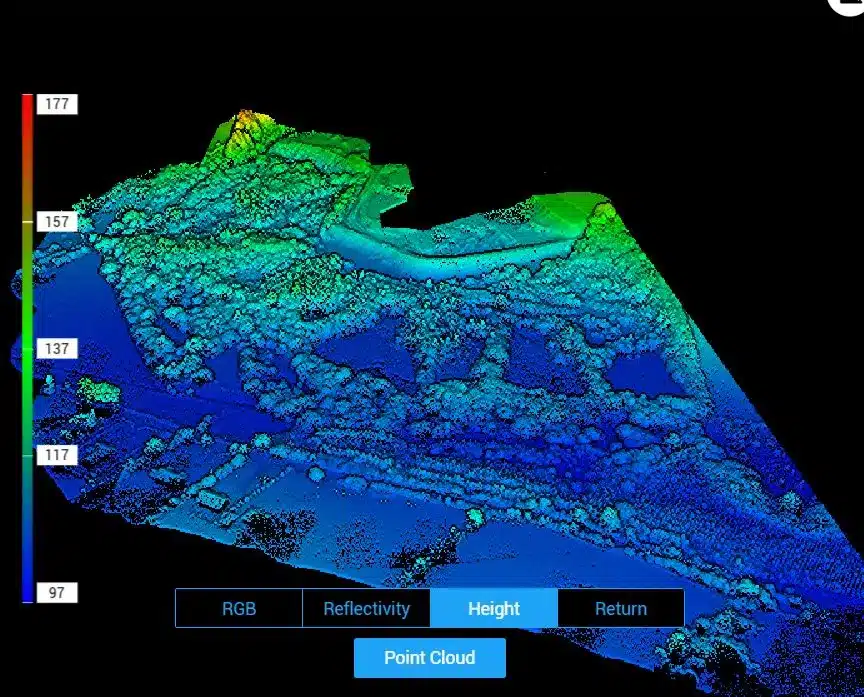
Point clouds via ReCap
The main route for drone point cloud data into Revit goes through Autodesk ReCap:
- We deliver the point cloud as .LAS or .E57
- Your team imports into ReCap Pro, which converts to .RCP/.RCS
- The .RCP links into the Revit project as a point cloud reference
Once in Revit, you can navigate through the cloud, snap to point positions, cut sections through it, and use it as a guide for modelling geometry.
Things to get right on import
- Match coordinate systems – if the Revit project is in ITM, the point cloud needs to be too. If you’re using a local grid, we provide transformation parameters.
- For very large datasets (500 million+ points), we pre-process into tiles or thin the data so Revit handles it smoothly
- ReCap preserves LAS classification codes, so you can filter in Revit – show only ground for surfaces, only buildings for modelling
Topographic surfaces
Revit’s topo surface tool accepts point data directly. We deliver terrain data as:
- Point file (.CSV/.TXT) – X, Y, Z coordinates for direct Revit import as a toposurface
- DWG contours – link as CAD and use to build the toposurface
- Simplified ground-classified points thinned for Revit topo generation
For site design, the drone topographical survey gives you accurate existing levels for grading, drainage, and building pad levels.
Orthomosaic as base map
The georeferenced orthomosaic can go into Revit as a decal on the toposurface or as a linked image on a reference plane. It gives you a photographic base showing what’s actually on the ground – vegetation, access, neighbours – right inside the model.
Practical workflows
Renovation and extension
For existing building work, the Scan-to-BIM workflow brings the building into Revit as modelled geometry. The drone specifically contributes:
- Roof geometry from aerial point cloud – essential for extension design, roof plant coordination, structural assessment
- External wall geometry, window positions, architectural detail for facade modelling
- Accurate terrain and neighbouring buildings for planning visualisation and rights of light
New build
For new construction, drone data provides existing conditions:
- Revit toposurface from drone DTM – accurate ground for cut-and-fill estimation at design stage
- Orthomosaic base map for site layout
- 3D context model of adjacent buildings for visual coordination
Construction phase – checking what was built
During construction, periodic drone surveys give you updated point clouds to overlay on the Revit design model. You can check:
- Structural positions match design
- Floor levels and slabs are correct
- Facade alignment and building envelope geometry
- Roof construction matches intent
This feeds the digital twin approach – keeping Revit aligned with reality throughout construction.
Performance tips
Point clouds can slow Revit down on complex projects. What helps:
- We deliver large sites in tiles you can selectively load
- Exterior survey data thinned to 1 to 5 cm spacing gives adequate detail for most BIM work without killing performance
- Use ReCap’s region tools to clip to the area you’re working on
- A workstation with 32 GB+ RAM and a decent GPU handles point cloud display comfortably
Specifying data for Revit projects
When commissioning drone survey for a Revit project, tell us:
- Coordinate system and datum (ITM / local grid / Revit project base point coordinates)
- LOD required if Scan-to-BIM modelling is included
- Point cloud format preference (.LAS, .E57, or pre-processed .RCP). If your team works in Revit and needs .RCP files, we can handle the conversion for you so the data is ready to link straight into your project.
- Terrain data format (points, contours, or both)
- Orthomosaic resolution and format
Our guide on writing a drone survey specification covers this comprehensively.
To discuss drone data for your Revit project, get in touch. More on our 3D modelling and survey services.
Handling the ITM / Revit coordinate question
Revit’s internal tolerance is measured in millimetres but it performs badly as objects move far from the project base point. Drone data arrives in Irish Transverse Mercator coordinates – which for most Irish sites means Northing values around 700,000 and Easting values around 600,000. Import that cloud directly into Revit and the survey base point lands 900 km from the origin, which triggers Revit’s large-coordinate warnings and can break shared coordinates between files.
The clean workflow is:
- Import the cloud through ReCap, not directly from LAS. ReCap handles the coordinate shift and writes a clean RCP file.
- Set the Revit project base point somewhere near the building footprint (usually a defined corner of the site grid).
- Set the Revit survey point to the real-world ITM coordinates of the same corner.
- Use “Acquire Coordinates” on the linked RCP to align Revit with the cloud’s real-world position.
- Freeze the survey point and base point relationship before anyone starts modelling.
Done correctly, this gives you a Revit model that reports real-world ITM coordinates on export to IFC while keeping the internal geometry close to the Revit origin. We supply a short written coordinate note with every deliverable covering exactly this, so the BIM coordinator does not have to reverse-engineer it.
Common import errors and how to fix them
“The point cloud is too large” warning
ReCap will import clouds of essentially any size, but Revit’s linked view of a multi-gigabyte cloud is sluggish. The fix is to create a thinned version of the cloud (10 to 20 percent of the original density) for day-to-day modelling, and keep the full-density version available for detail checks at key moments. CloudCompare does this in thirty seconds and LAStools does it in ten. We can also deliver a pre-thinned companion cloud on request.
Cloud appears but is rotated 90 degrees
Usually a Z-up versus Y-up axis confusion during export. The fix is in ReCap rather than Revit – re-register the cloud with the correct axis convention and re-export. We flag this during QA and it rarely reaches the client, but if you inherit a cloud from another vendor it is the first thing to check.
Cloud sits at the right position but in the wrong units
Feet versus metres. Rare in Ireland but common on clouds imported from US sources. Check the RCP unit setting in ReCap before importing.
Cloud is monochrome when it should be RGB
The source LAS did not include RGB attributes, or the exporter stripped them. This is a re-export issue, not a Revit issue. We include full RGB on all our photogrammetric and hybrid clouds as standard.
Working with Navisworks and ACC (BIM 360)
On larger projects the Revit model rarely lives in isolation. It ends up coordinated with architect, structural, and MEP models in Navisworks, and the whole federation lives in Autodesk Construction Cloud (formerly BIM 360). The good news is that drone reality data flows through this federation without friction, provided a few things are done right.
Include the RCP file as a linked reality capture in Navisworks, not as an attached model. This keeps the federation size manageable and means updates to the cloud (after a progress flight) propagate to every coordinating party with a single re-publish. On ACC, upload the RCP to the Reality Capture folder rather than the Plans folder so it is treated as a reference dataset.
For clash detection, the reality cloud is typically the “ground truth” reference and clashes are reported as model-vs-reality deviations rather than clashes between modelled elements. This is a powerful way to flag issues like a column that was built 50 mm off the grid and has not yet propagated into the structural model.
Frequently Asked Questions
Can I link an RCP file into Revit and work with it directly?
Yes. Revit supports linked RCP files via Insert → Point Cloud. Once linked the cloud appears in all views and can be used as a modelling reference. You can adjust its visibility, display colour, and section box behaviour per view. For very large clouds, linking a thinned copy is recommended for day-to-day work.
How do I align the drone point cloud with the existing Revit model?
If the existing Revit model has shared coordinates, use Acquire Coordinates on the linked cloud. If not, pick two known points (for example, two building corners visible in both the cloud and the model) and use Move Point Cloud by 3-point alignment. We include recognisable alignment targets in our deliverables where possible.
What is the best format to deliver drone data for a Revit workflow?
RCP (or RCS tiles) for the point cloud, referenced in ITM with a coordinate note. An OBJ or FBX textured mesh if a visual model is wanted alongside the cloud. A GeoTIFF orthomosaic for the site plan background. A DWG 2D topographic drawing for the architectural set. We supply all four as standard.
Can you re-fly the site during construction to update the model?
Yes, and this is one of the genuine high-value use cases. A monthly drone flight plus an updated RCP handover keeps the Revit federation aligned with site reality throughout construction. For more on this, see our article on digital twins and keeping the model current.
Does the drone data include interior spaces?
No. Drone capture is exterior-only by design. For an interior-plus-exterior deliverable we pair drone capture with a terrestrial scan of the interior, typically using BLK360 or RTC360 scanners, and co-register the two datasets for a single deliverable.
For survey teams: For survey teams considering reality data alongside traditional survey, see our survey-supplementation guide.